Diagnosis
If the outside temperature displayed on the DIS on your console doesn't match reality or your HVAC blows hot air when you asked for cold or visa versa, the G89 Outside Air Temperature Sensor on your B5 Audi may have gone bad. To confirm that your sensor has failed, you can scan for codes or use the diagnostic mode built into your HVAC unit.
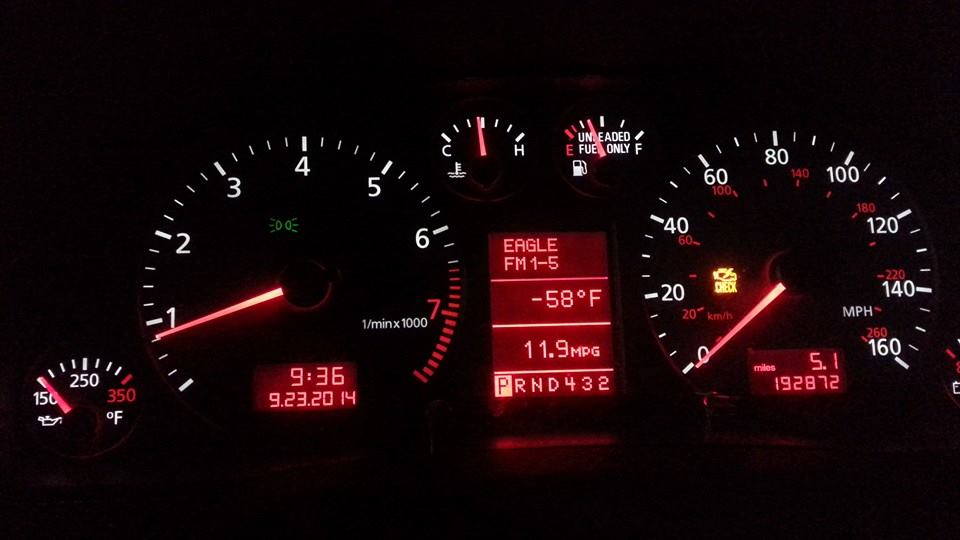 This photo by Paul Verrill
Required Tools & Parts
Here's what you'll need to do this job.
- Replacement G89 Outside Temperature Sensor (Audi Part Number 4A0820539A)
- Phillips screwdriver
- 10mm socket, short extension and rachet handle
- Wire cutters or snips
- Regular pliers
- Needle nose pliers
- Something like pliers with padded handles
- At least one foot of soft wire: 14 — 20 gauge
- At least one foot of stiffer wire: 10 —14 gauge (copper electrical wire is perfect)
- As many of your favorite beverages as required for 30 minutes of work
- Optional but recomended — replacement cabin air filter, see part numbers below
Disassembly
Once you've determined the sensor is faulty, replacing it is in order.
Now, you could go by-the-book and do as the Bentley manual instructs - remove the dash, fan, etc, etc. Book rate is something like eight hours. Or you could do an ugly hack as some others have recommended - clip the leads under the dash and drill a new hole for your replacement sensor. But why, when you can do the whole job in 20 minutes.
Let's get to it.
Click here to skip to the heart of instructions.
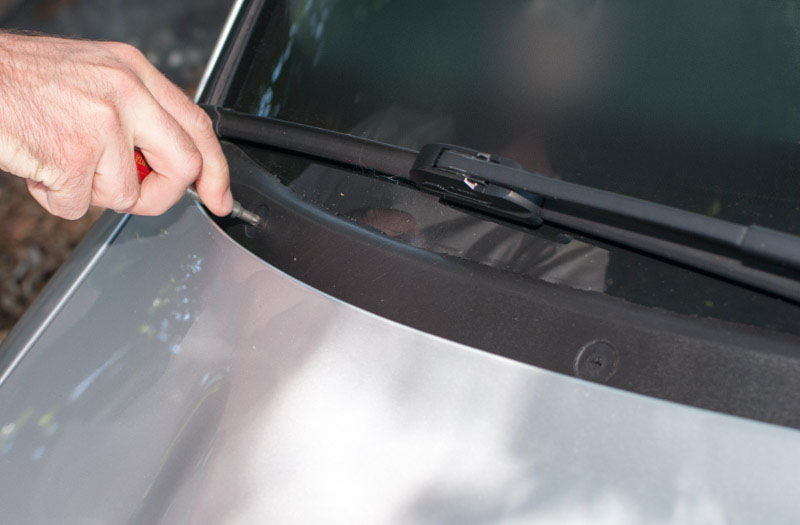
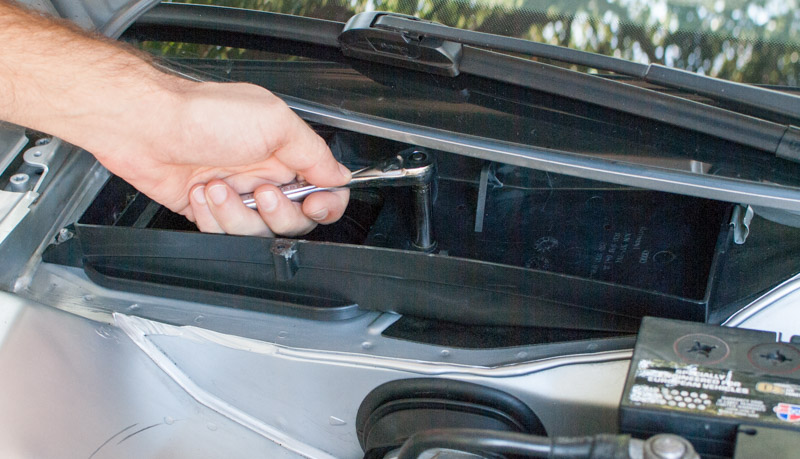
Remove Windshield Cowl
With the hood closed, use a phillips screwdriver turn the outer latch ¼ turn CCW to disengage latch.
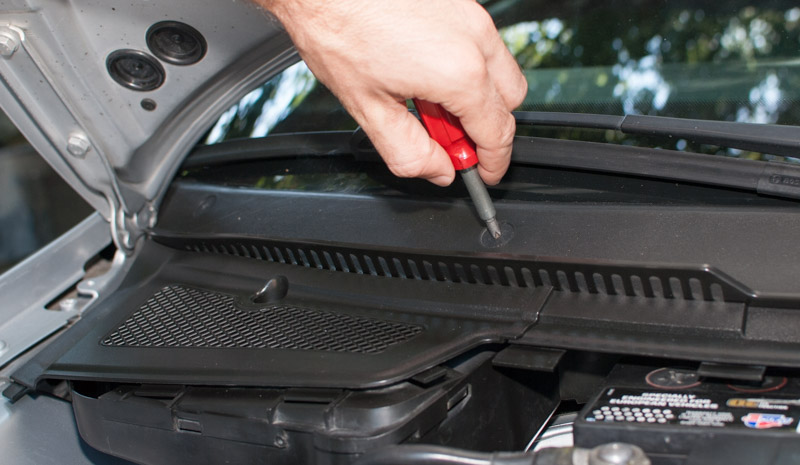
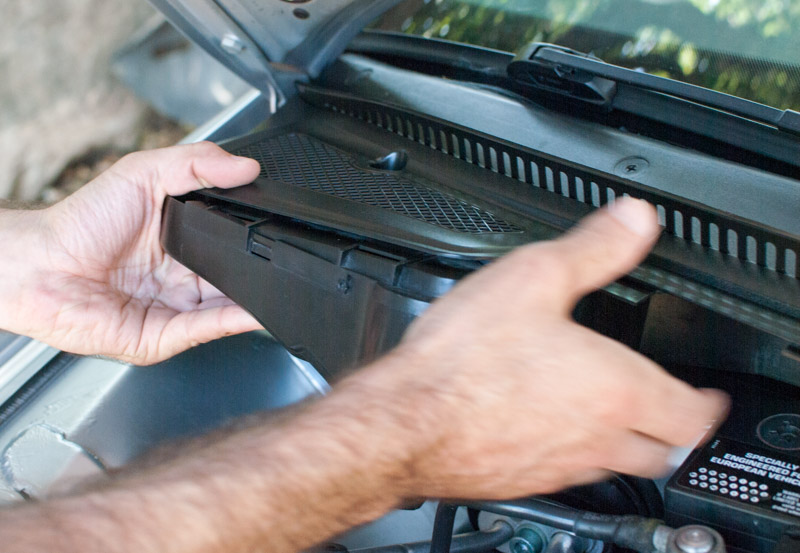
Remove Cabin Filter Cover
Slide assembly shown down, forward, and out. Take care to carefully disengage this half of the windshield cowl from the driver's side cowl as you remove it. Also note that there is a flange hanging down behind the battery, take care not to snap it off while removing the cover.
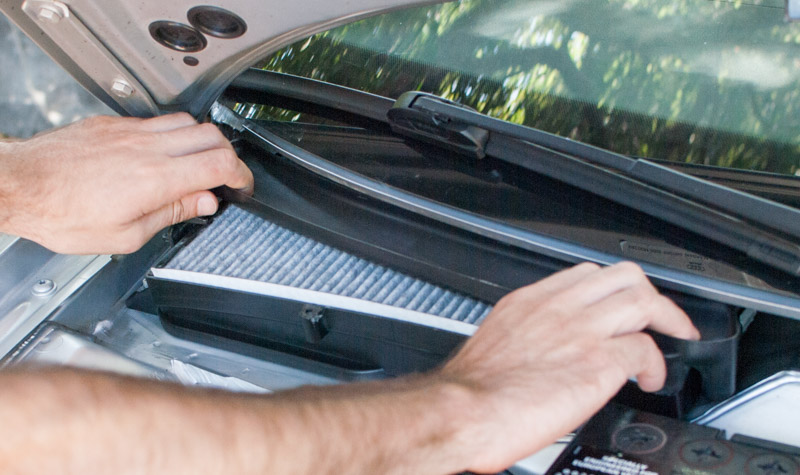
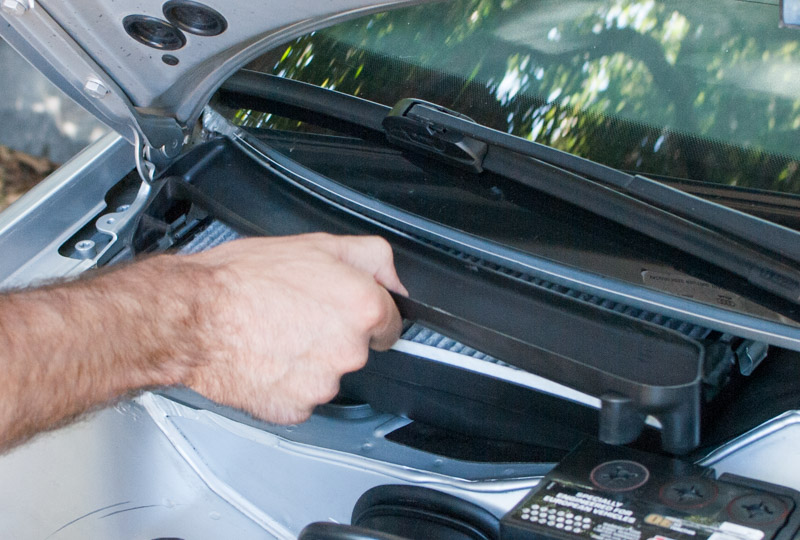
Remove Rain Channel
Slide the little tray forwards in its slots to remove. Note relationship of tray to metal clips on the left and right sides for re–installation.
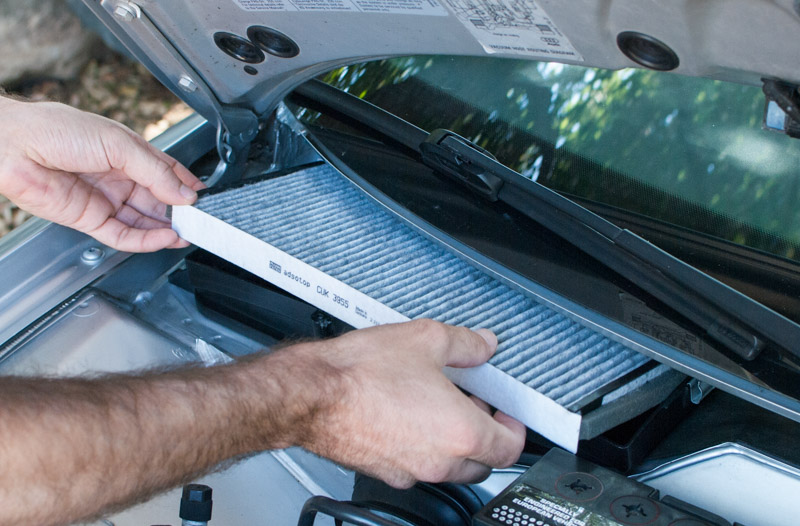
Remove Cabin Air Filter
Lift forward edge of filter and slide forwards and out.
It is probably a good idea to replace the cabin filter while you’re at it. Here are the part numbers:
| Audi Part Number | Mann-Filter Part Number | Description |
|---|---|---|
| 8A0819439A | CU 3955 | Normal "dust and pollen filter insert" |
| 8A0819439B | CUK 3955 | Activated Charcoal "filter insert with odour and; harmful substance filtering" |
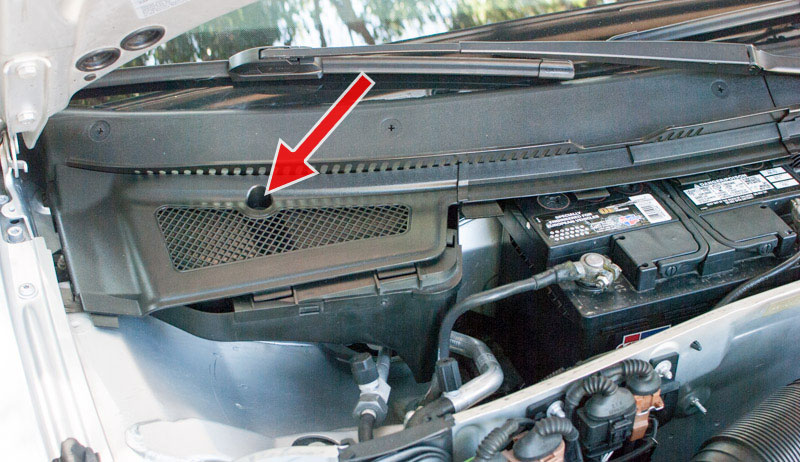
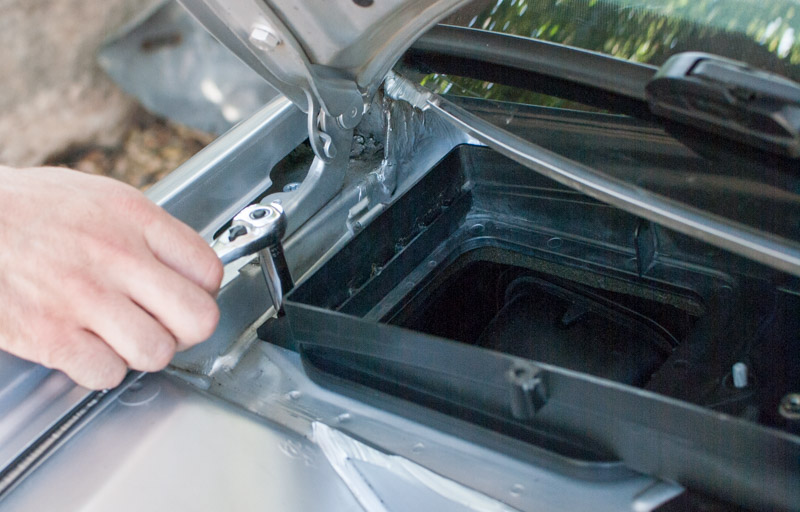
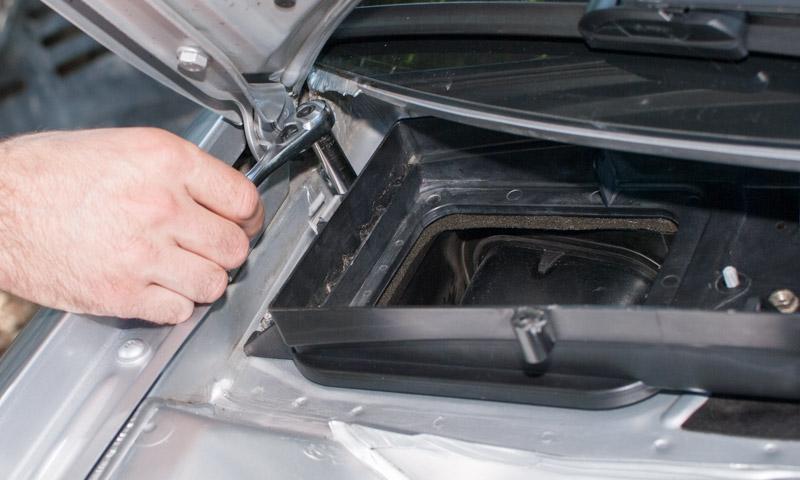
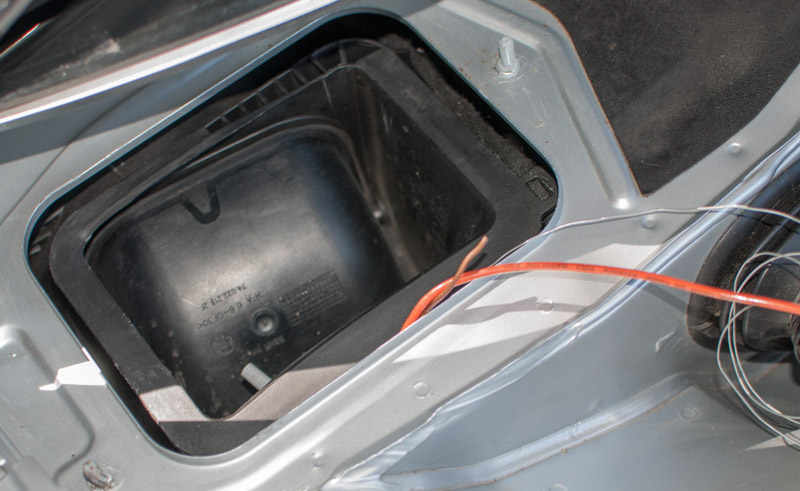
Remove Filter Carrier Frame
Before proceeding, it would probably be a good idea to stuff a rag or something down in the hole to keep parts or junk from falling into the fan.
Remove three nuts holding frame in place. One inside the box
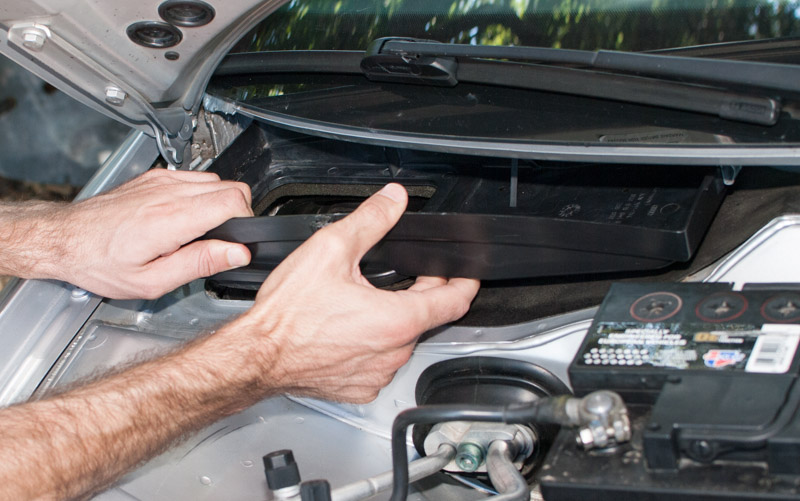
Remove Filter Frame
Slide forward and remove. The foam gasket around the bottom opening may be adhered to the flange on the body. Take care in removing it to avoid tearing the gasket.
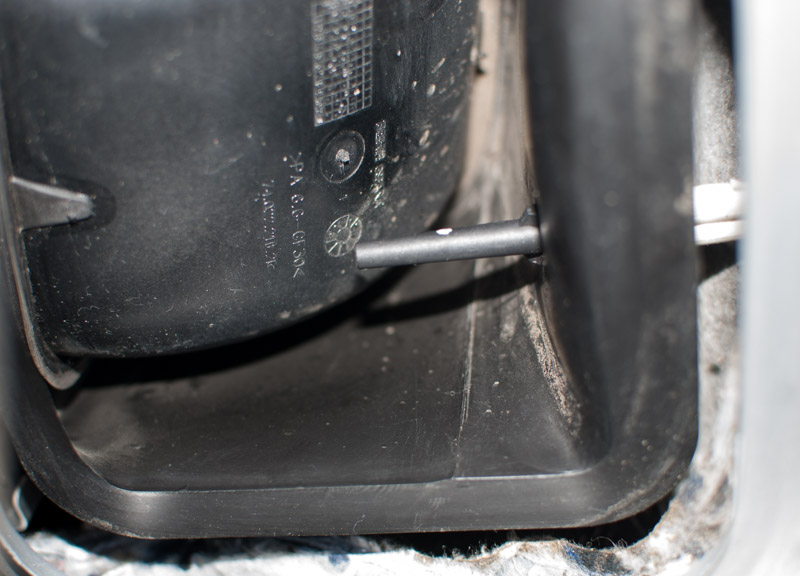
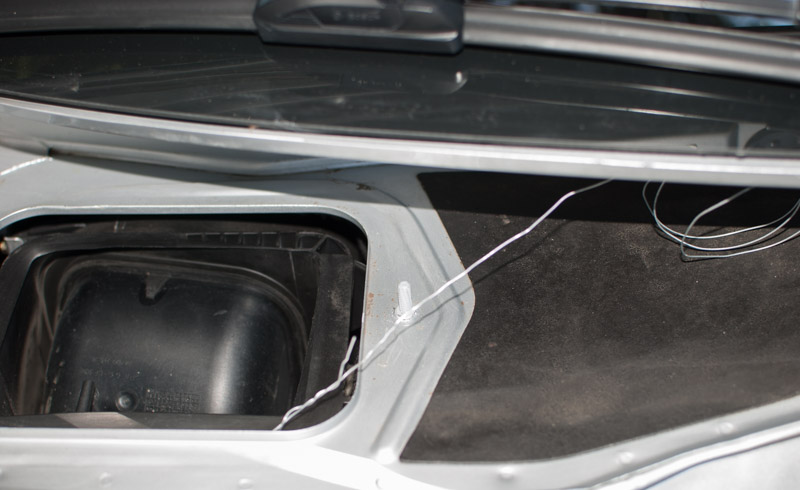
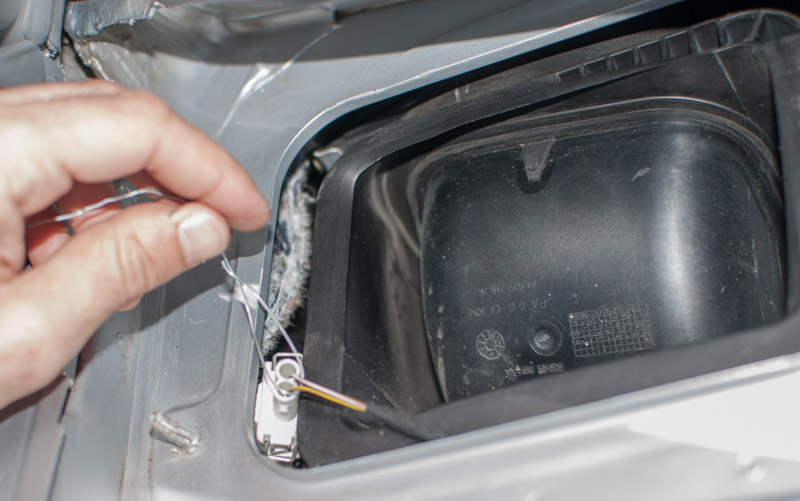
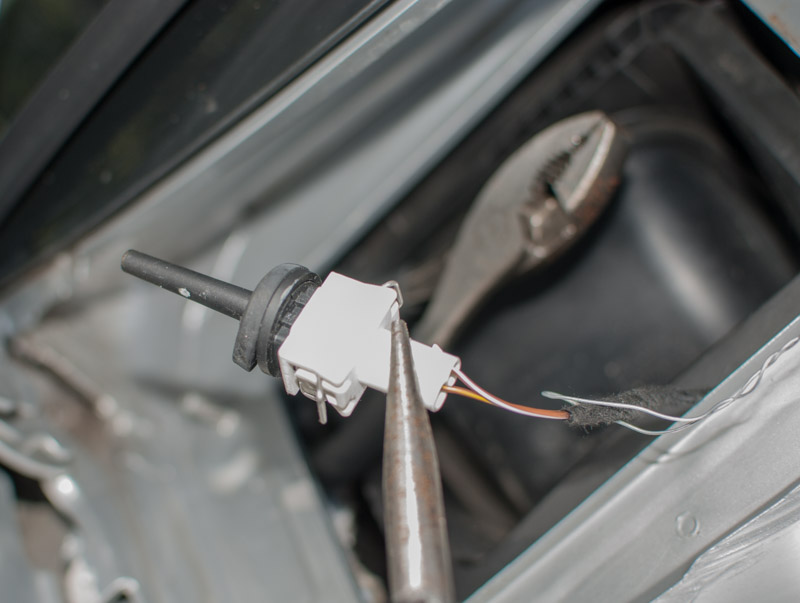
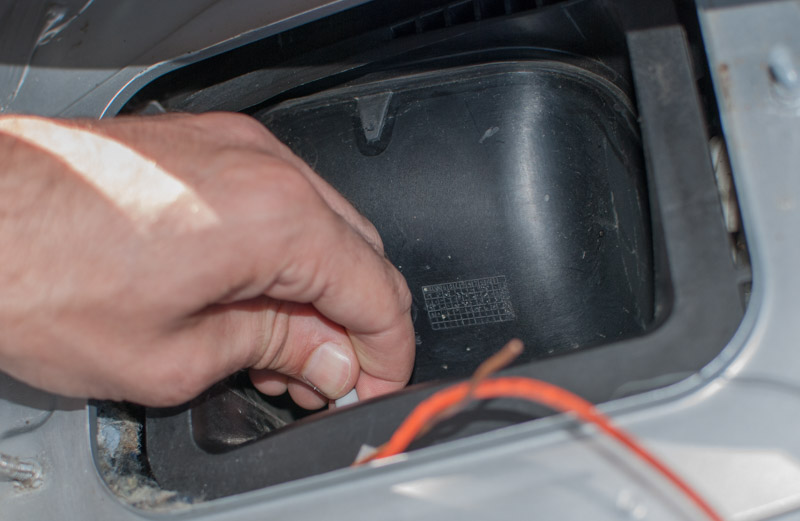
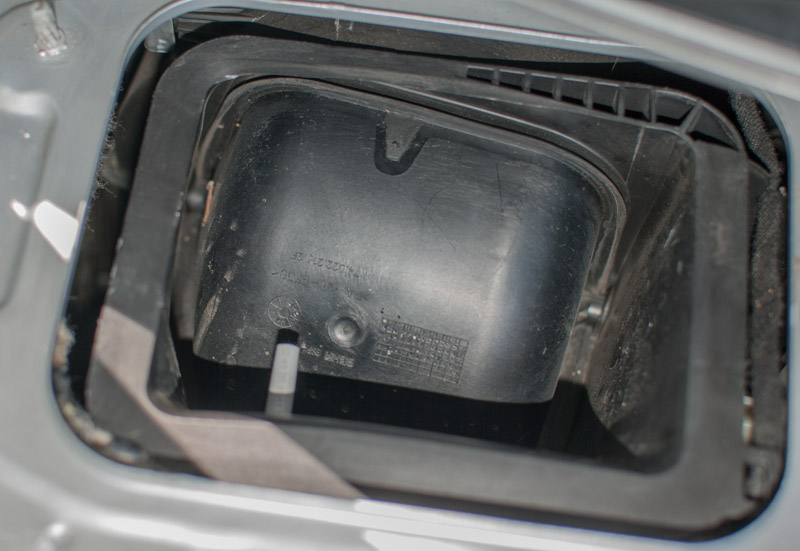
The Culprit!
The black spike sticking in from the right is the G89 Outside Temperature Sensor (Audi Part Number 4A0820539A) To the right of the edge of the evaporator housing you can see the light gray plug for the sensor. (Note the two winged tabs at the base of the sensor holding it into the housing.)
Get Tricky
Now we're getting into the key part of this process where we get tricky and finagle the sensor out with a shortcut instead of taking the long way around.
Make a Lead Keeper
Bend a J hook out of your softer wire. The long end should be about 6 inches and the short end about two inches.
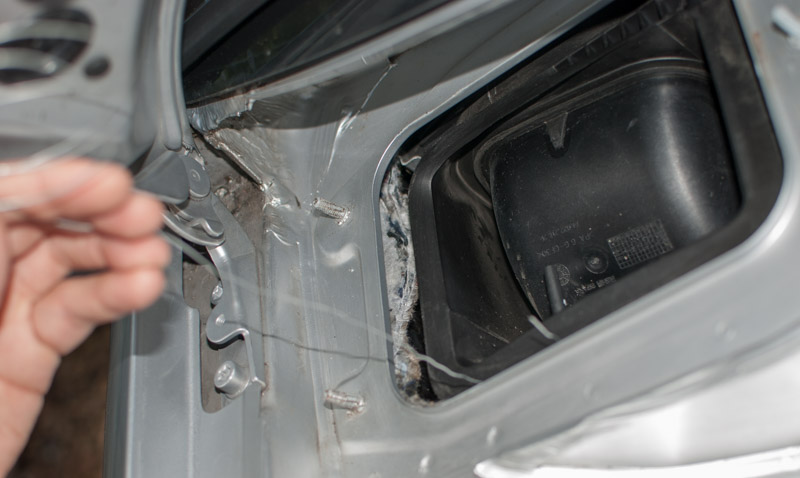
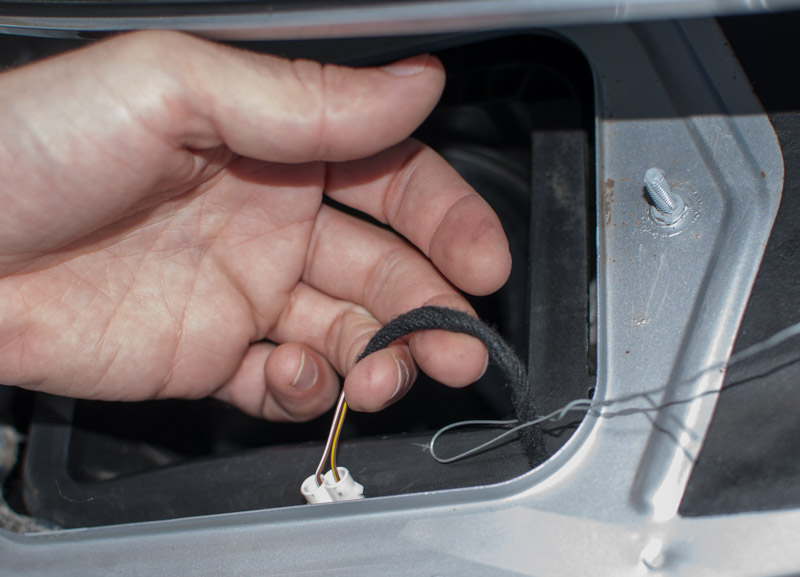
Capture the Sensor Lead
Insert your J hook in the gap between the body and the plastic air channel and catch the cloth–wrapped wire coming from the sensor.
Pull up and Twist
Once you have the sensor lead captured, pull it up and twist the short end of your J wire around the longer side. You're keeping the wire from getting away and falling down into the inaccessible depths of the car.
Set Wire Aside
Now that the sensor's wire can't escape, put your holder wire aside.
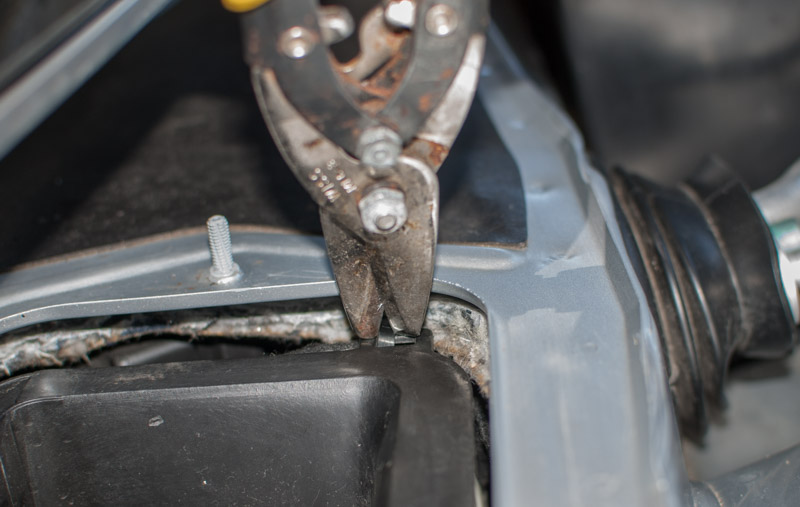
Clip Zip–Tie
There's a zip-tie holding the sensor lead to the inboard corner of the air inlet. Cut it off to give yourself some more slack in the wire.
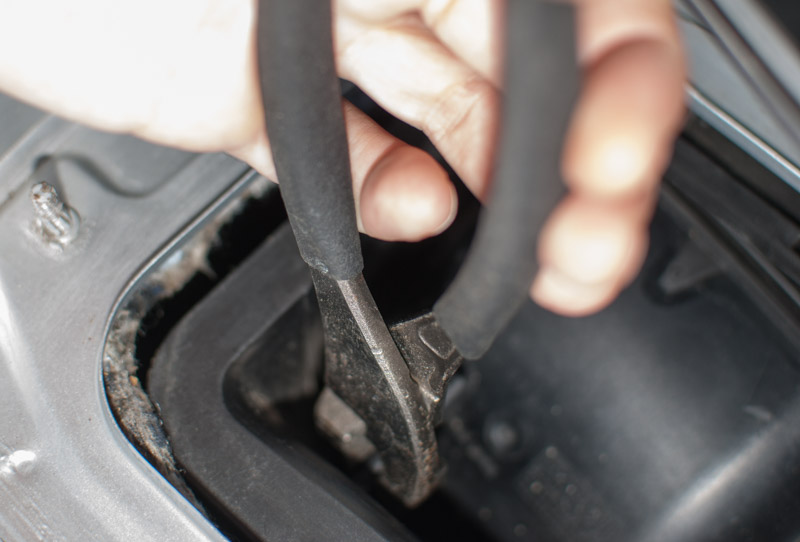
Remove Sensor
The G89 Outside Air Temperature Sensor is held into the cabin air inlet with two wings. Using pliers, rotate the sensor 90 degrees to release the tabs and align them with the corresponding slots in the housing.
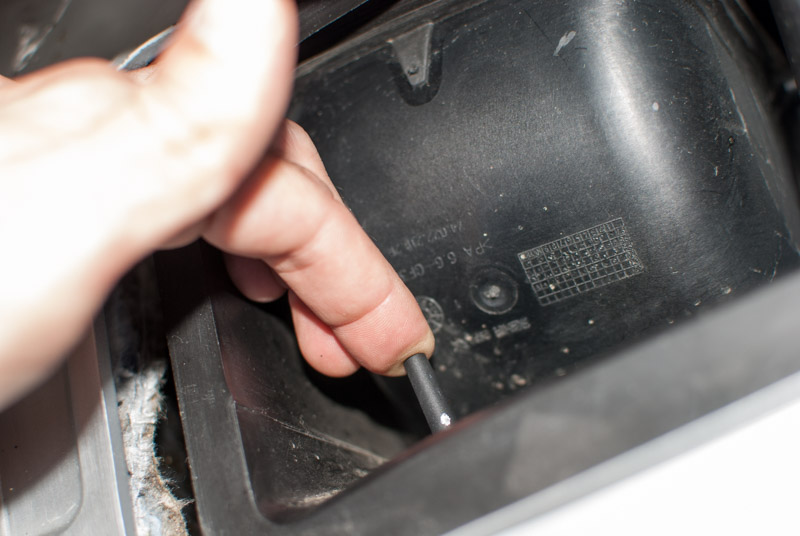
Push Sensor Out
The sensor should wiggle freely now. Push it out of the air inlet. You'll probably have to angle it to the side as there isn't much room behind it. If it won't go out. clip off as much of the round sensor tip as you can to make it shorter and easier to remove. (Don't let any bits fall into the fan or bottom of the inlet.)
Bring up the Sensor
Here's where your J wire holding the lead first comes in handy. Once you pushed the sensor out of its hole, it probably fell down and would be lost in the abyss except you've got a handy wire wrapped around it to pull it back up with.
The Problem
Here's the trick with this procedure. As you can see, the sensor and plug are too big to fit through the space between the body and the plastic inlet. What shall we do?
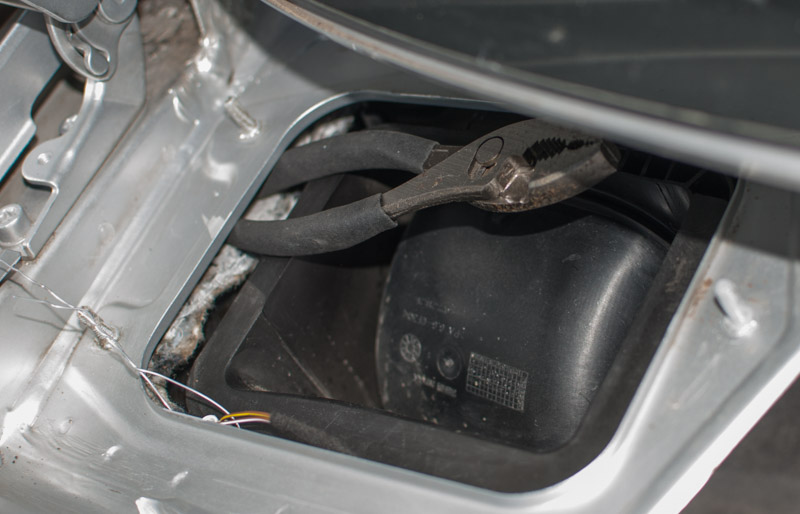
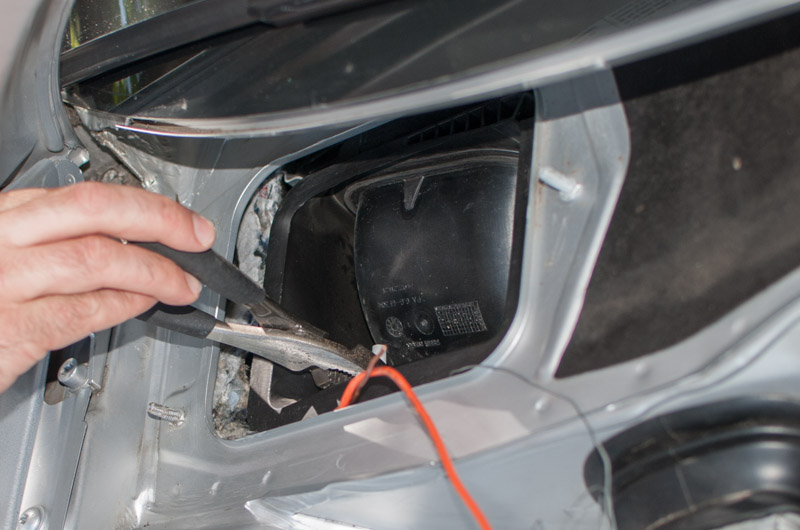
Make a Space
Remember, you're working with 13+ year old plastic that is potentially quite brittle!
The base of the sensor is a bit too big to fit through the gap between the body and the air inlet so we have to make a little more room to get it out. Fortunately for us there's enough flex in the fresh air intake to open the gap enough to fit the sensor through. I used the padded handles of some pliers as they were the right thickness and the padding protects both the paint on the body and helps to not crack the plastic housing. Use whatever you have on hand that's appropriate and gently pry the gap towards the outside of the car open enough to remove the sensor through.
Use extreme caution and don't push more than you have to.
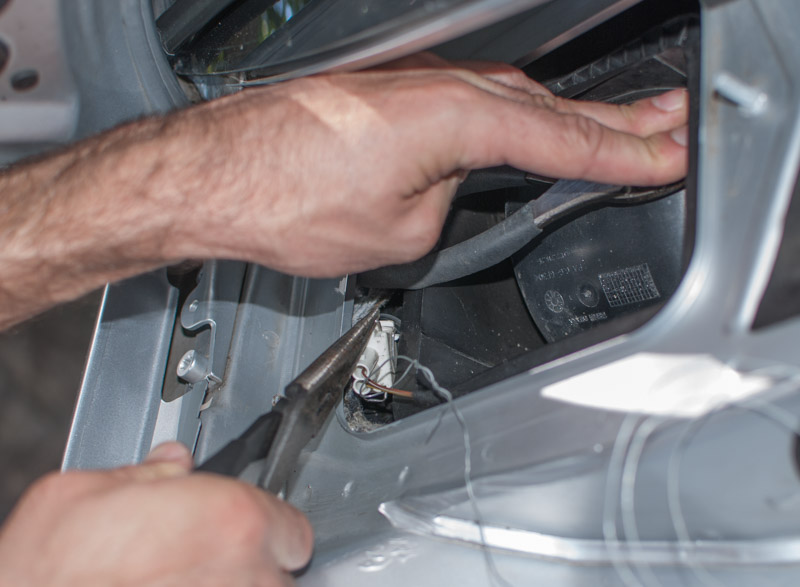
The Crux Move
So, here's what you do. Push down on your lever gently enough to not crack the housing but enough to open the gap enough to to slip the sensor and plug out. With the gap open, use the J wire to slide the sensor to the far end of the gap and then grab the wire bail on the plug with pliers or some such and slip the the sensor out of the gap.
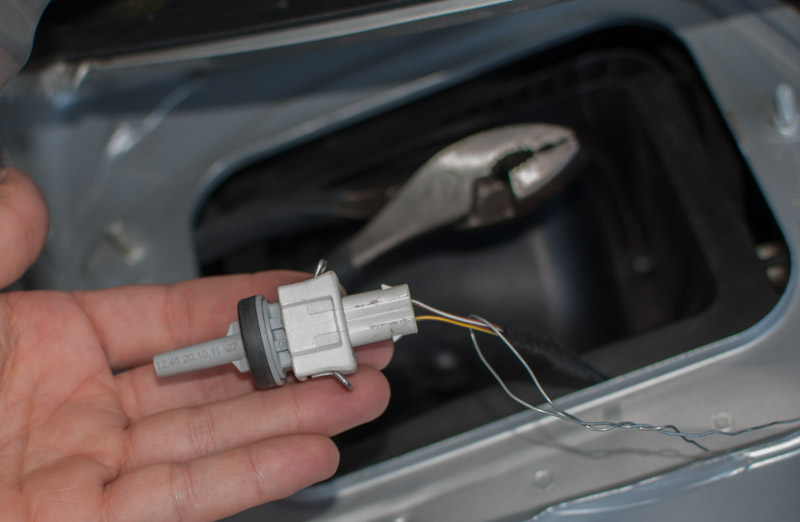
Success!
Here's the culprit free of its confines. It looks fine, but is no longer sending plausible signals to the HVAC.
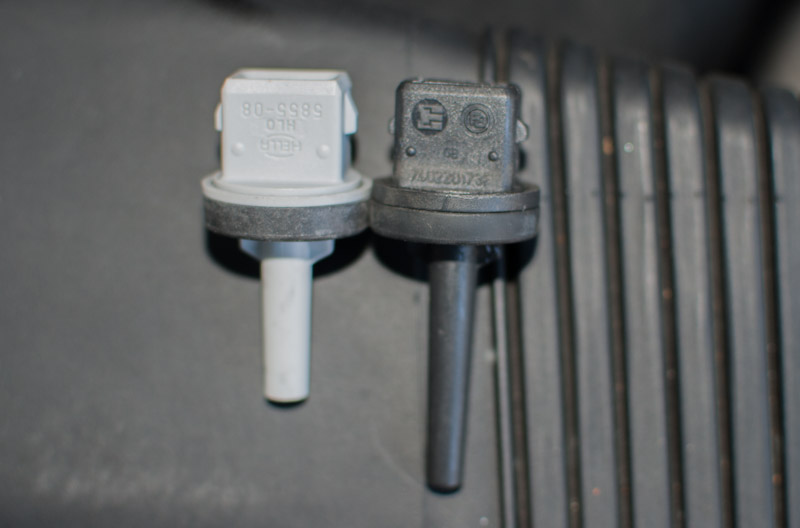
New v. Old
The new replacement Hella sensor on the left and the old one that came with the car on the right. (Yours may look like either depending on which revision you purchased.)
Getting Warm
With the new replacement sensor plugged in we simply reverse the process, right? Well, almost.
Crux Two
Removing the bad sensor, we just pushed it out of the housing. How about getting the new one poked through the hole successfully? Here's the second trick of the procedure.
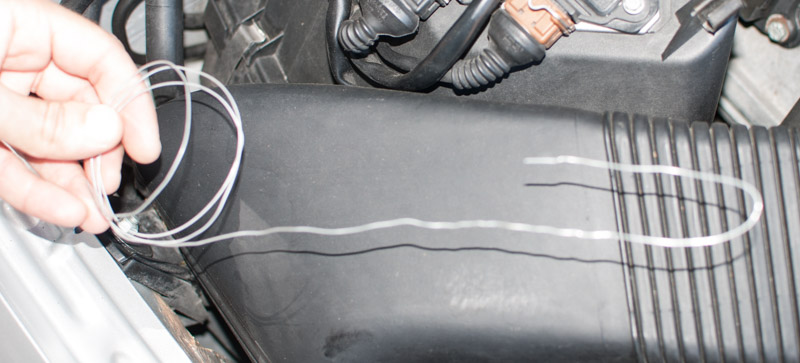
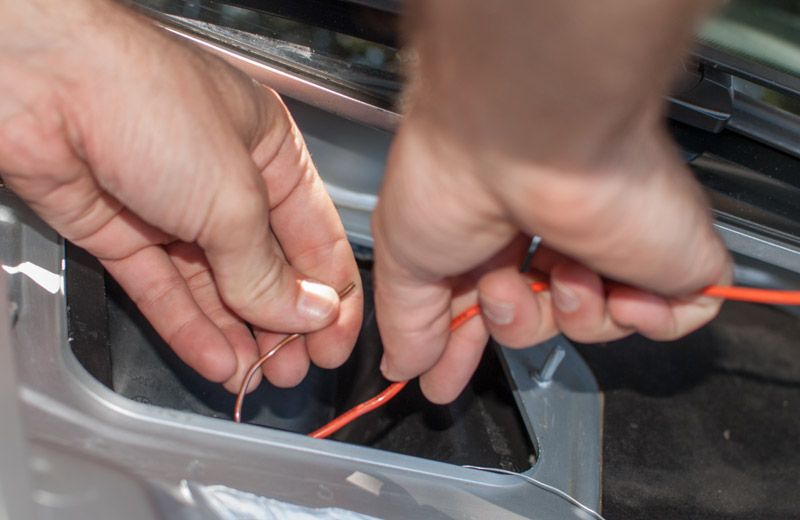
Attach “Handle” to Plug
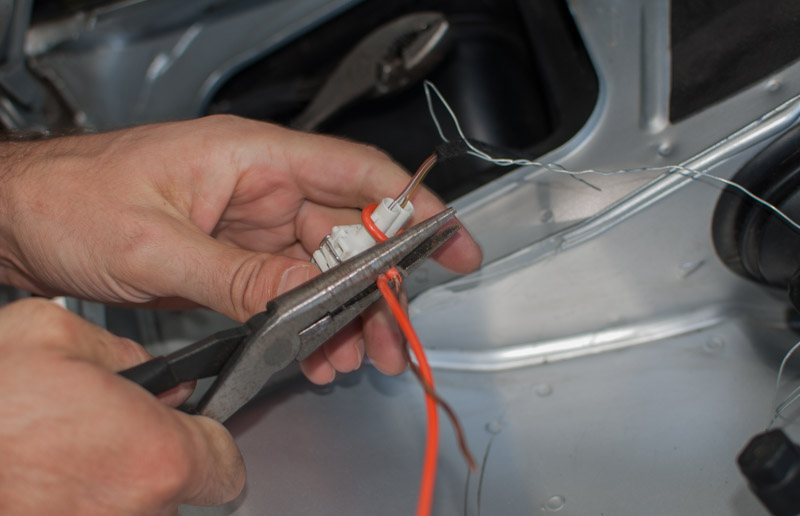
Take your length of stiffer wire. Here I'm using 12 gauge insulated copper electrical wire. Use something comparable. Stiff enough to use as a handle, but flexible enough to wrap tightly around the plug.
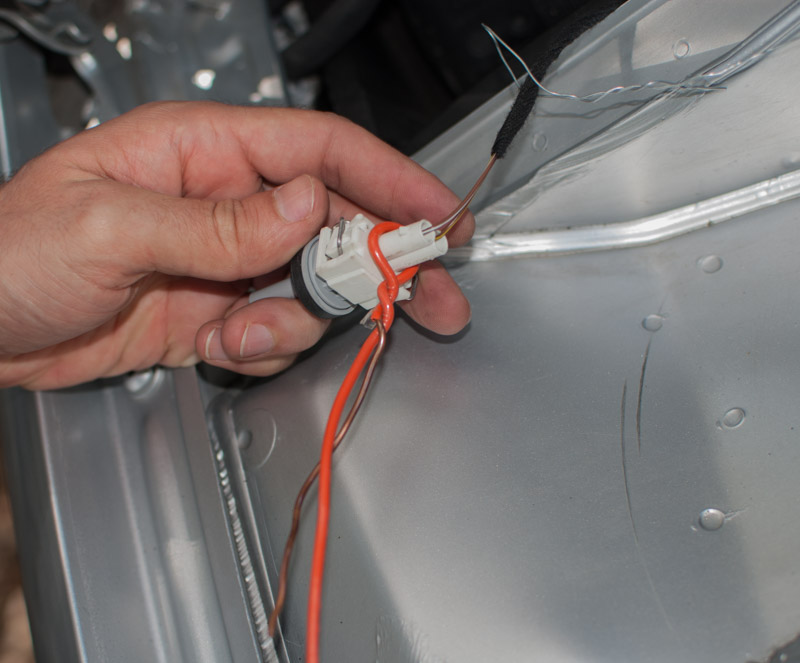
So take your stiff wire and wrap it around the end of the plug. Get it pretty tight so it won't slip off and the plug doesn't wiggle around too much. Note that the tail end of the wire is pretty long — about 3 inches — this is important in getting the wire off the plug later.
Reinsert
Now you're ready to reinstall the sensor. Using your lever, open the gap up again and slip the sensor, plug, and handle back through.
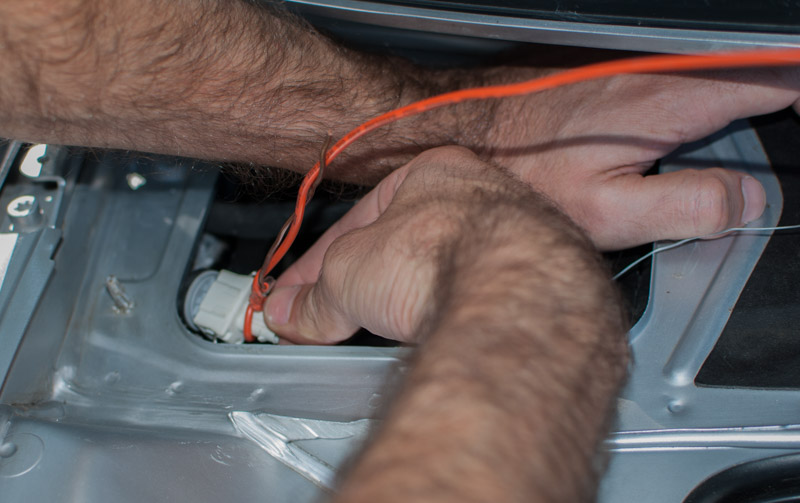
Here's the sensor in the gap. You're now done with your lever and can remove the pliers or whatever you used.

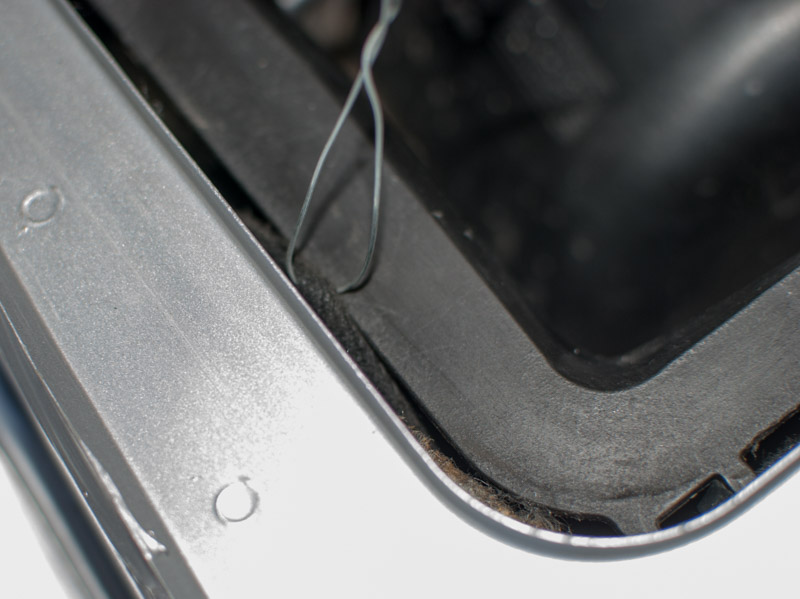
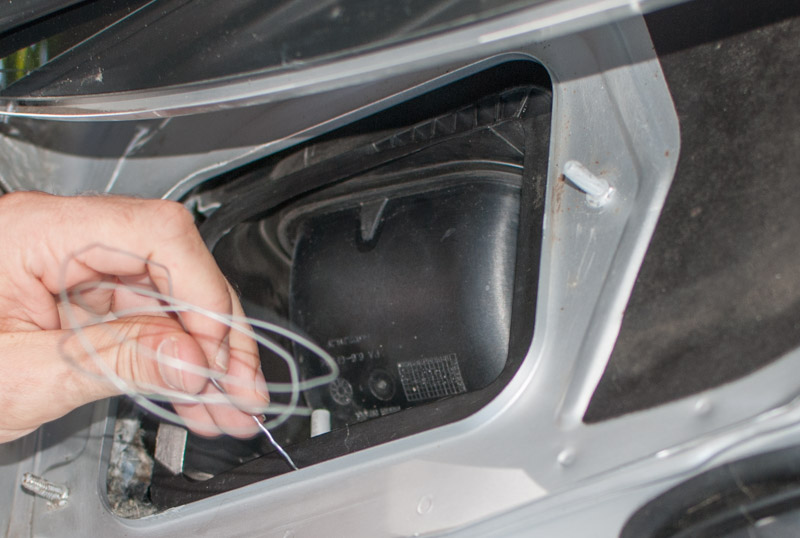
Poke it Through
Now, using the stiff wire handle you created, maneuver the sensor around the corner and slip the tip into the hole.
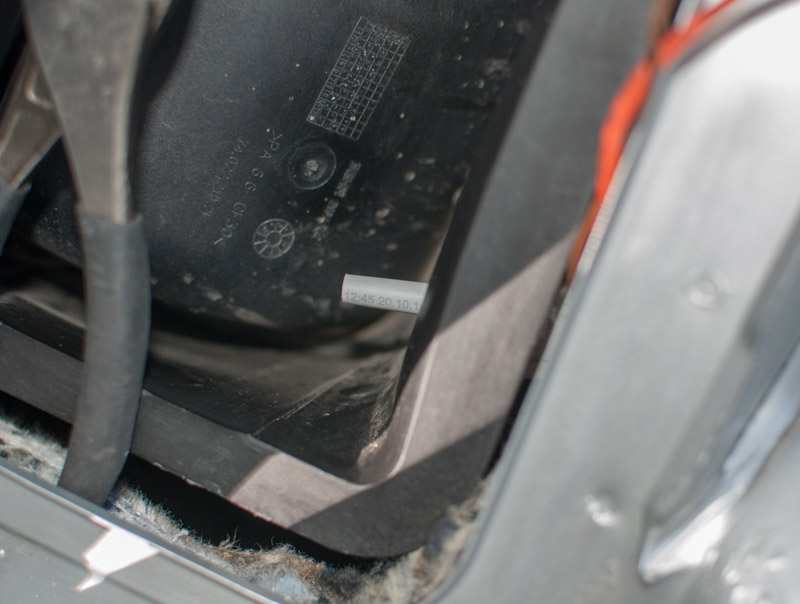
Another view of the sensor through the hole and the two guide wires hanging out of the gap.
Pull Into Place
Pull on the tip of the sensor to get it all the way into the housing. You may need to rotate it to align the winged tabs with the slots in the housing.
Lock In
Just like removing the old one, use pliers to twist the new sensor 90º so the tabs lock the sensor into the housing. Check with your fingers to make sure it's seated nicely.
(Un)wrapping Up
You're done with the tricky bits! Un–twist the stiff “handle” guide wire and remove it from the plug.
Re–Zip-tie
If you want to reattach the sensor lead to the housing with a new zip-tie, use the J wire to do so now. Then un–twist and remove that wire as well.
Reassemble!
Phew! Not too bad huh? Take a moment to step back and admire your handiwork. Now simply reverse the Disassembly Instructions to put everything back together.
Thanks to GrahamCracker for reading a draft and s4zando for feedback and edits. Last updated Aug 24, 2015.